Controls in cab.This paragraph provides an overview of all of the instruments and controls inside the cab. Unless specified otherwise, these are applicable for all versions. Read the chapter "Operating instructions" thoroughly to use the controls indicatec herein correctly.
Front/dashboard controls
1-Multifunction instrument
2-Forward-Reverse shuttle
3-Air conditioning control panel
4-Multifunction instrument controller
button
5-Lights selector stalk with horn button
6-Front air conditioning vents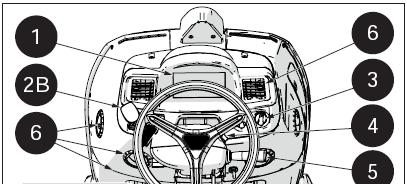
7-Hazard warning light switch
8- Windscreen wiper switch
9- Windscreen washer and wiper
10- Rear Window washer and wiper
11 - Steering wheel adjustment lever87 / 246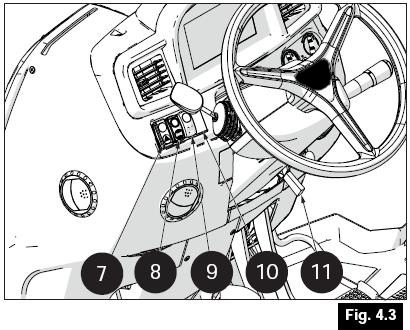
12-Front air conditioning vents
13-Air conditioning blower speed selector
14-Air conditioning temperature selector
15-Ignition switch
16-12V power socket
17- A/C compressor switch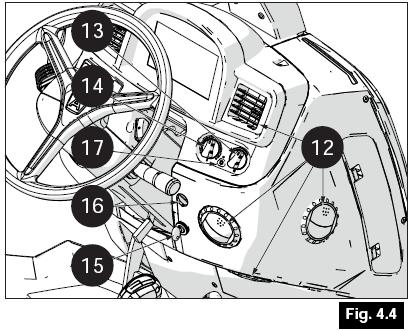
18- Clutch pedal
19- Left hand brake pedal
20- Right hand brake pedal
21- Foot throttle pedal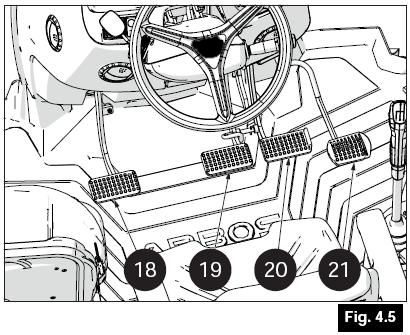
Right hand console
1- Rear auxiliary distributor control levers
2- Hand throttle lever
3- Range selector lever (Slow/Fast)
4- Diverter switch
5- Supercreeper gear selector lever
6- PTO enable switch (safety switch)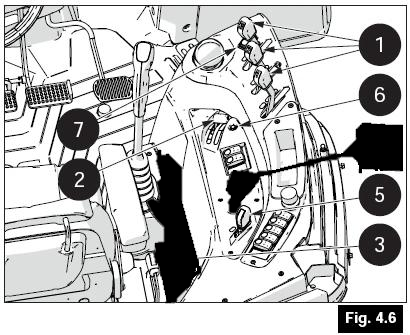
8- 4WD selector switch
9- Differential lock selector switch
10- Front work light switch
11- Beacon light switch
12- Rear work lights switch
13- 3 pole socket
14- CAN diagnostic port
15- PTO on/off palm-operated button
16- regeneration switch
17- inhibition of regeneration switch
18- Trailer brake test button
19- Engine speed set switch
20- Power Boost switch(If there is)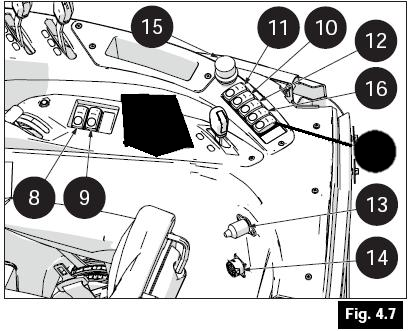
Left hand console
1- Rear PTO speed selector lever
2- Audio system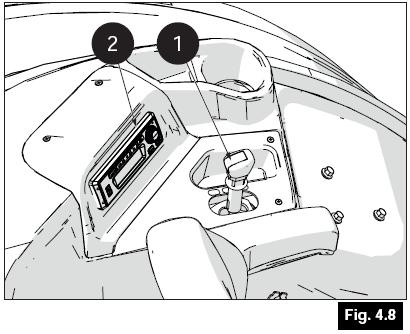
Driver zone controls
1- Cab battery master switch
2- Gear lever
3- Parking brake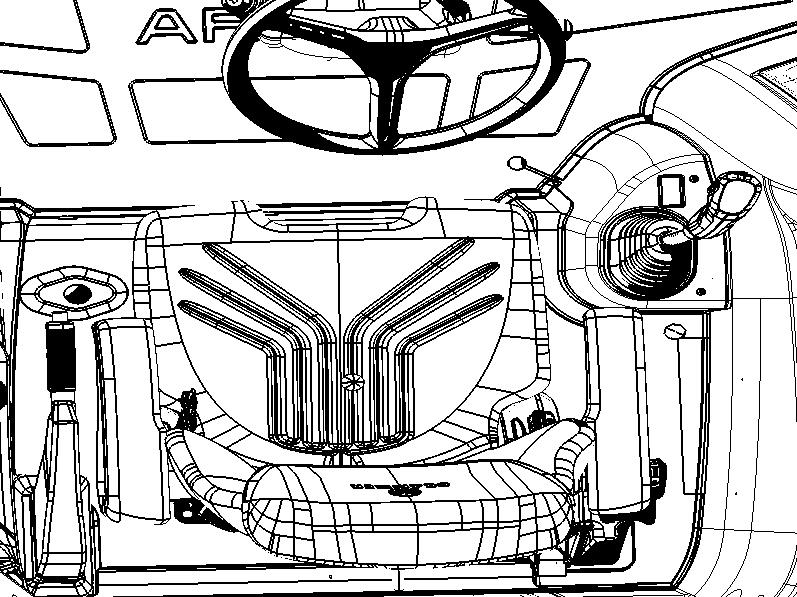
Powershift controls
1-Transmission clutch control regulating wheel
2-Transmission clutch switch
3- + powershift switch
4- - powershift switch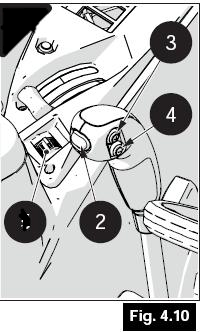
Electronic rear lift controls
1-"Set Point" knob
2-Control mode selector knob (position,
draft, mixed)
3-Maximum lifting height selector knob
4-"Transport" mode selector button
5-"Transport" mode LED
6-Arm lowering speed selector knob
7-Arm being lowered LED
8-Led "Error/Stop" LED
9-Arm being raised LED
10-Lift up/down switch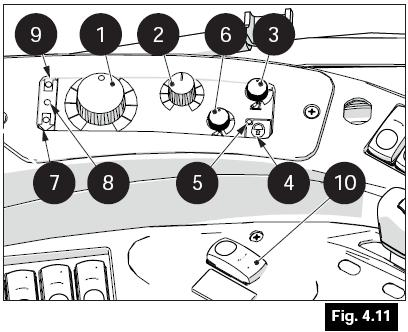
Controls outside cab
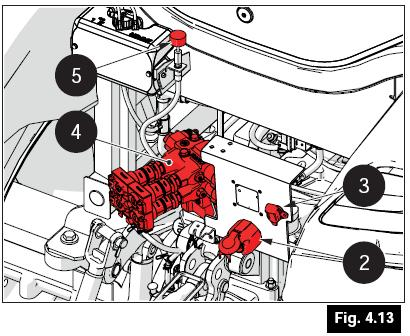
1- Battery master switch
2-7 pole socket for trailer
3-3 pole socket
4- Rear distributor quick couplings
5- Flow divider/Splitter (if present)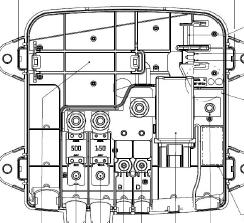
Electronic rear lift controls on mudguard
1- Rear lift down button
2- Rear lift up button
Note
These controls can be found on both reat mudguards.
With the help of the external mounted“rear-push buttons” the hitch can be raised and lowered and the maximum distance of each movement is 100mm. Commands from operating-panel inside cabin /dual lever are overruled by Rear-pushbuttons.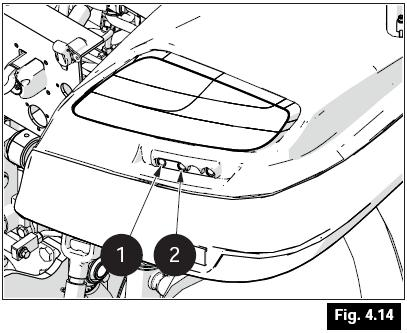
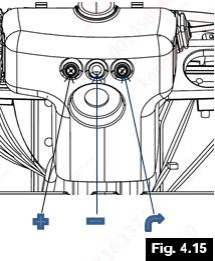
Multifunction instrument
The multifunction instrument consists of a digital
display on which all the informnation relative to the
operation of the tractor is displayed. It is controlled
from a button situated behind the steering wheel on
the right hand side. This button allows the operator to
interact with the display and select and view
diagnostic information on the digital dashboard.
situated behind the steering wheel on the right hand
side, allows the operator to select and view diagnostic
information on the digital dashboard Press the "+/-"
button to see all the diagnostic information in the
lower part of the instrument cluster press and hold
"+/-" to select related information
Note
The screen may suddenly turn black if:
-the incorrect application is loaded;
-the OK button is pressed and held.
Turn the ignition switch clockwise to turn the
display on. The welcome screen is displayed.